Power Locks 101: Converting manual pulls to remote-activated power-thrusters
These days, buying a new vehicle that isn't already equipped with power door locks and windows can be a challenge. Power accessories are usually bundled in an option package, and most car dealers stock surprisingly few "stripper" models on their lots.
Although some truck owners prefer the simplicity and dependability of manual locks, their power-actuated counterparts offer several advantages, particularly when combined with a keyless-remote system: hands-freer door unlocking, no dealing with frozen lock cylinders in the winter, faster egress when parked in bad areas, easier kid-loading and so forth. (The shaved-handle show-truck crowd is already familiar with these types of systems.)
For anyone who wants to feel the power and experience the convenience of on-demand door locks, here's on overview of what it takes to power up manual locks yourself. Several kits are on the market, and one of the most time-tested systems is from Electric-Life. An OE power-lock and -window supplier to Ferrari, Lamborghini and others for more than 26 years, ISO9002-certified Electric-Life only recently began selling directly to the public in addition to professional installers. The extensive product line includes universal and custom power-window kits and even power trunk systems.
Electric-Life offers a Universal Power Door Lock Kit to convert nearly any manual-locking vehicle to central power locks. Two- and four-door systems are available. The basic kit includes Swiss-made actuators (in 2- and 4-door configurations), the Central Locking Module, a wiring harness, mounting hardware and instructions. Options include a keyless remote system that has two 4-button transmitters with a 100-foot range; the base kit also integrates with most alarms or keyless entry systems. For a show-quality conversion, Electric-Life stocks a variety of billet and stainless wire ports, door-post conduits, pass-through trim pieces and other accessories.
DIY
The most challenging part of this power-lock job is finding the optimal location for mounting the power actuators--this is a universal kit, so some trial-and-error will likely be necessary. The actuators must clear the door panels and all moving window parts while mating to the OE lock linkage. Once one actuator is successfully installed, the others go on quickly. Electric-Life's best installer can reportedly do a four-door power-lock conversion single-handedly in 1.5 hours. We spent a full day doing the job shown here on a 2000 Nissan Xterra, due to photo interruptions.
The end result surpassed expectations. The Electric-Life actuators are so authoritative that the factory lock-pulls seem like they'll eject into midair.
Installation
Potential Tool List:
- Screwdriver assortment
- Pliers and wire cutters
- Torx drivers
- Door-handle removal tool
- 3/8" ratchet set/sockets
- Allen wrenches
- Wire crimpers
- Automotive test light
- Tape measure
- Box and open end wrenches
- Drill
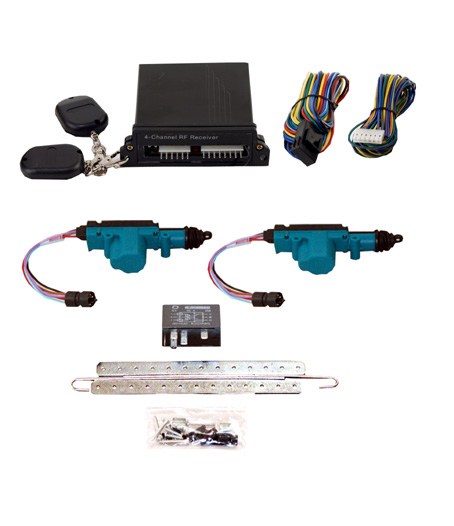
Electric-Life's Universal Power Door Lock Kit includes an actuator for each door (2-door kits available), the central locking module/relay, wiring harness, lock rods and mounting hardware. Keyless-remote is an optional upgrade.
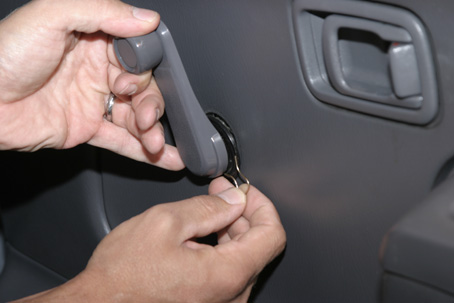
Carefully remove the door handles and window cranks (which might require a special tool). A shop manual is helpful here.
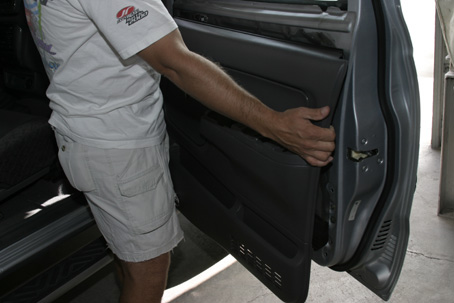
Remove the armrest, then carefully pry away the door panel with a special tool or screwdriver covered with masking tape to prevent scratches before removing the panel.
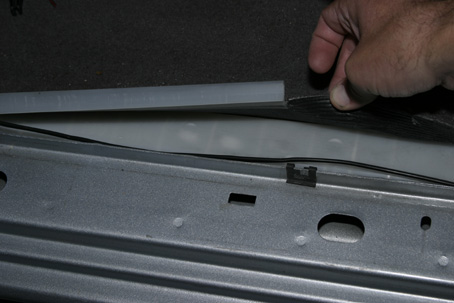
Remove any remaining armrest hardware, then carefully peel back or remove the inner watershield, saving it for reinstallation later. Test the manual locks to learn how they operate.
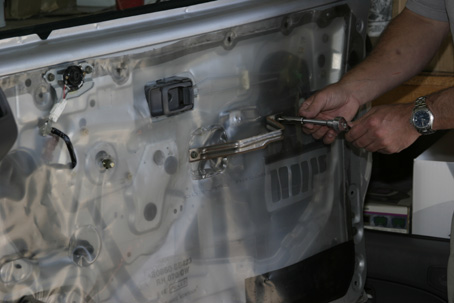
On the Xterra, the actuators installed inside the door panel, out of sight. We marked and drilled mounting holes. For many applications, the kit's mounting straps, which are drilled to match the actuators' holes, simplify installation.
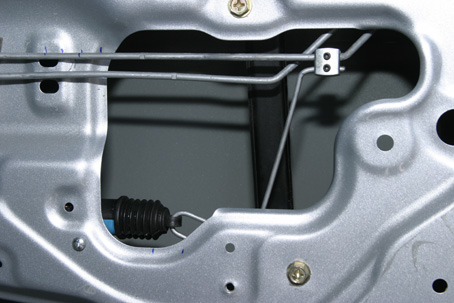
Bend the kit's lock rod to run parallel to the factory lock linkage. Then "synchronize" the actuator and stock lock linkage by positioning both at mid-travel (note marks) per the instructions. The Electric-Life lock rod then bolts to the factory linkage using the kit's coupling. Secure all fasteners and double-check clearances with door panels and moving window parts.

Pick a spot for the Central Locking Module near a constant-hot circuit.
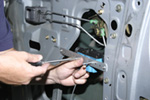
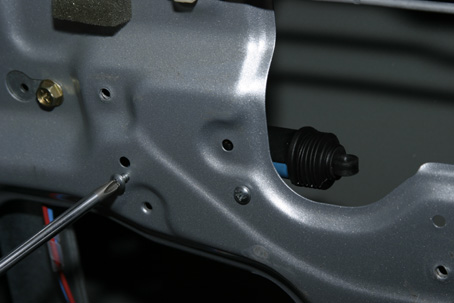
Route the wiring harness under carpet and through the door jambs to each actuator: 5-wire connections to front actuators, 2-wire ones to the rear.
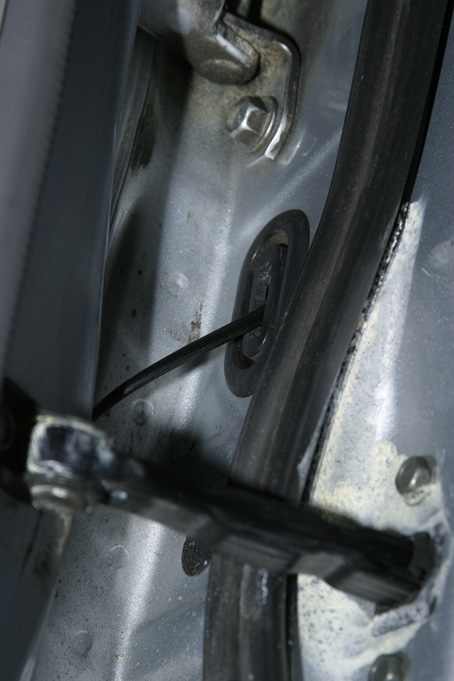
If the harness can't be fished through existing door-jamb conduit, Electric-Life offers several drill-and-mount options that'll keep the wires from getting pinch when the doors are shut. We used existing front conduit and cut holes in B-pillar drain plugs.
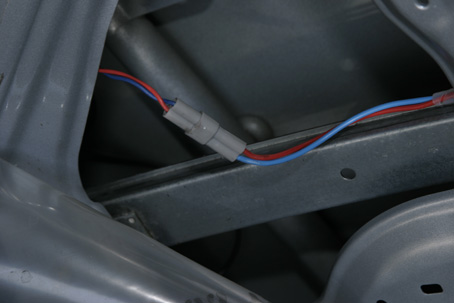
Plug in all harness connections and wire the Central Locking Module to a constant-hot circuit per the instructions. Then test the system. All locks should spring into action when one is activated either manually or with a key. For out-of-sync locks, unplug and reverse the wiring harness at the actuator.
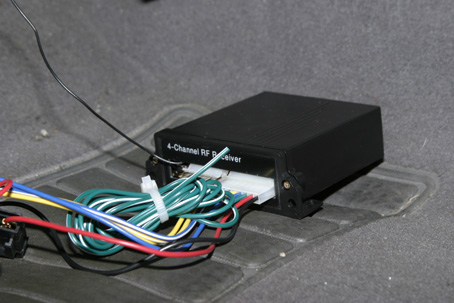
If using the optional keyless remote kit, wire it to the Central Locking Module per its instructions.
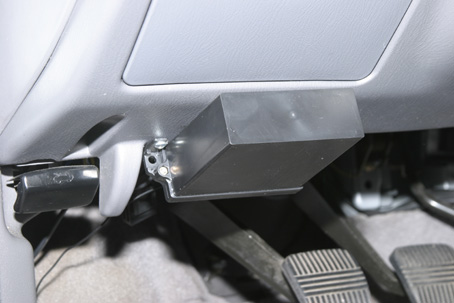
Finish the job by mounting the keyless entry receiver module, securing all wires with zip-ties and reinstalling the door panels.
Source
Electric-Life
5990 Northwest Hwy
Chicago IL 60631
800-548-2168, Fax 773-763-7880
www.electric-life.com
Back to the article index.