|
|
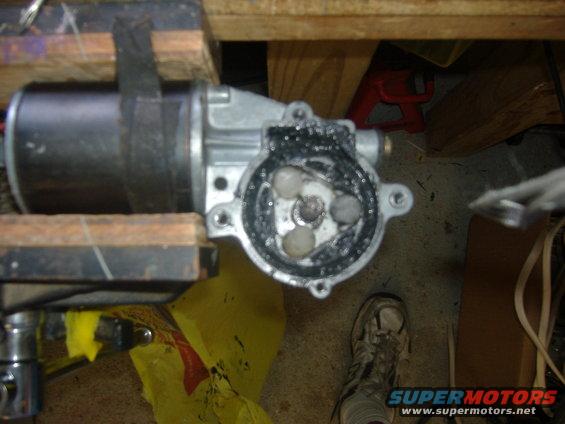
When you removed the broken bushings, you probably removed a lot of grease also. It was then the triangle inside was uncovered. Put the new bushings in the corners and put the cog back in. But it's not nice and easy. The pressure from the bushings make the cog turn,so it's a tight fit. I put a LITTLE bit of grease on the underside of the cog, in the indents. Put it in place and give it a good shove with your fingers to wedge it in there. Then I took a hammer and GENTLY beat it into submission. Put the cover back on and put the motor back in, which is fun. Hint: get your fingers behind the sheet metal to try and hold the three bolts as they go in, else get one of those long flexable lines with the magnet on the end. (or a wife with long, skinny arms) as the bolts are sure to fall down inside the bottom of the door...or is that just my luck?
|